ATE factory calibration
MESTEC factory calibrations at manufacturer level ensure that your measuring devices work with the maximum possible precision at all times.
The reliable basis for your everyday requirements.
MESTEC factory calibrations include the following:
Inspection
Our technicians inspect every single assembly for mechanical damage. A comprehensive function test is then carried out.
Care
The assemblies are cleaned, whereby special attention is paid to the solder joints and the plug-in connections.
Factory calibration
All specific values that may change over time are tested. Several hundred measurement points per device are compared to the “measurement standard”. The calibration tolerances are narrower than those in the specifications. In this way, we ensure that the measurement results remain accurate until the next calibration is due.
Adjustment
If a tolerance deviation is detected during a calibration, the deviating measurement points are adjusted back to the “measurement standard”.
Traceability
Complete traceability is just as essential as having precise measurement results. We ensure this traceability by means of several factors.

As a customer, you will receive an appropriate calibration report in addition to the calibration certificate.
Our service is ISO 9001:2015 certified. The guidelines in Sections 4 to 7 of ISO 17025 are accredited annually by an independent third party.
As a condition of this audit, all our own measuring instruments are checked annually by a DAkkS accredited body.
The underlying certificates as well as the QM can be viewed by request.
Limit values within the calibration

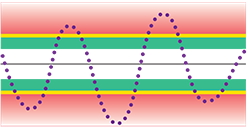
Level 1
Device is within the limit values but exceeds the inspection tolerances. Adjustment is required.

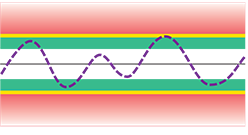
Level 2
Device is within the inspection tolerances. It passes the standard calibration test. The tolerance range is used in full.

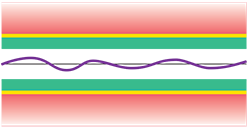
Level 3 – KAP
Device works with the highest precision after adjustment has been carried out.
- High measurement accuracy
- Safety
- Delay in exceedance of the tolerances
- Outside the specifications
- Measurement uncertainty
- Margin for environmental factors
- and ageing
